Search keywords:
product name, product type, model number,
test method, manufacturer, technique, application
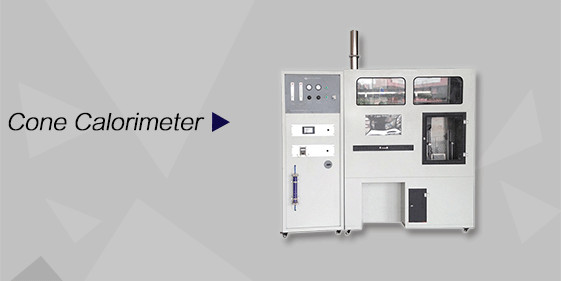
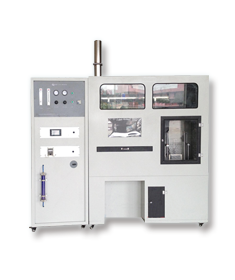
Cone Calorimeter
BACKStandards:
ISO 5660, ASTM E1354, ASTM E1474, ASTM E1740, ASTM F1550, ASTM D6113, NFPA 264, CAN ULC 135, BS 476 Part 15.
Applications:
The Cone Calorimeter is the most significant bench scale instrument in the field of fire testing.
Product Information:
Heat release is the key measurement required to assess the fire development of materials and products. Traditionally it has been very difficult to measure and more recently full scale testing of items (e.g. furniture) has been possible by burning these articles and measuring the evolved heat using a technique called oxygen depletion calorimetry.
In the early 1980's workers at NIST (formerly NBS), in the USA, decided to produce an improved bench scale heat release test which would overcome the deficiencies of existing small scale heat release tests which relied on the measurement of the outflow enthalpy of enclosed systems. Oxygen depletion calorimetry was identified as the best measurement method. This is based on the empirical observation that heat released by burning materials is directly proportional to the quantity of oxygen used in the combustion process. The instrument was called a Cone Calorimeter. This name was derived from the shape of the truncated conical heater that is used to irradiate the test specimen with fluxes up to 100 kW/m2 in the test.
The Cone Calorimeter can be purchased in modular form so that those laboratories with particular interests such as heat release, mass loss, smoke production, etc. can initially purchase the sections they require and later add further instrumentation into the same cabinets in order to complete a full specification instrument. This is just one of the advantages of the Cone Calorimeter.
A full system consists of:
1. Conical Heater - is wound in the form of a truncated cone, rated 5000W at 230V with a heat output of 100 kW/m2.
2. Facility for testing horizontally or vertically orientated specimens
3. Temperature control by the use of a 3 type K thermocouples and a 3-term (PID) temperature controller.
4. A Split Shutter Mechanism - protects the sample area before the test. This ensures the initial mass measurement is stable and the operator has additional time for system checks before starting the test. This added time is very important for easily-ignitable samples, which often ignite prematurely if a shutter mechanism is not used.
5. Specimen Holders - for specimens 100mm x 100mm up to 50mm thick, in the horizontal and vertical orientation.
6. Load Cell - mass measurements are conducted via a strain gauge load cell with an accuracy of 0.01g. Fitted with a quick electronic tare facility and mechanical stops to avoid movement damage, give stable results and long life.
7. Spark Ignition - by 10kV spark generator fitted with a safety cut-out device. The igniter is automatically positioned by a lever linked with the shutter mechanism.
8. Exhaust System - manufactured from stainless steel for long life. This comprises, hood, gas sampling ring probe, exhaust fan (with adjustable flow controls from 0-50g/s, at a resolution of at least 0.1g/s) and an orifice plate flow measurement (thermocouple and differential pressure transducer). Normal operation is at a nominal 24 l/s.
9. Gas Sampling - comprising particulate filters, refrigerated cold trap, pump, drying columns and flow control.
10. Oxygen Analysis - paramagnetic oxygen analyser, which has a range of 0-25% and a performance compliant with the standards.
11. Smoke Obscuration - measured with a laser system, using photodiodes, and a 0.5 mW Helium Neon laser, with main and reference (compensating) photo detectors. Supplied with alignment cradle and 0.3, 0.8 neutral density filters for calibration.
12. Heat Flux Meter - for setting the irradiance level at the surface of the specimens.
13. Calibration Burner - to calibrate the rate of heat release measured by the apparatus using methane of 99.5% purity.
14. Data Acquisition – Agilent Data Acquisition / Switch Unit featuring a 3-slot cardcage with 6½ digit (22 bit) internal DMM enabling up to 120 single-ended or 48 double-ended measurements. Scan rates up to 250 channels/s are available with a 115kbaud RS232 and PCI GPIB interface as standard. All readings are automatically time stamped and can be stored in a non-volatile 50,000-reading memory.
15. ConeCalc Software – it is available in multi-languages including English, French, German, Spanish and Japanese. The user interface is a Microsoft Windows based system with “user friendly” push button actions and standard Windows data entry fields, drop down selectors, check boxes and switches capable of:
1) Showing the status of the instrument.
2) Calibrating the instrument and storage of calibration results.
3) Collecting data generated during a test.
4) Calculating the required parameters.
5) Presenting the results in a manner approved by the Standards.
6) Averaging of multiple tests.
7) Exporting data into FDMS (Fire Data Management System) - a format used by major European and US labs for sharing data between labs with different calorimeters.
8) Exporting file for CSV (comma separated variable) files for quick transfer to spreadsheets.
Options
1. Carbon Dioxide and Carbon Monoxide - NDIR gas analysers optionally available.
2. Hydrogen Chloride - heated supply lines and gas analyser.
3. Controlled Atmosphere Attachment - for low oxygen sample analysis.
4. Mass Loss Calorimeter.
5. FTIR Toxicity Test System.
Protection Doors - to screen the operator from smoke generated by hazardous samples. The doors allow normal air influx from the bottom for natural test area ventilation and test air input. The protection doors enclose three sides of the test area, a steel panel covers the rear, the exhaust covers the top, and the test area floor covers the base.


