





How Can the Bubble Leak Tester Detect False Sealing and Pinholes?
2026/07/15
Share:

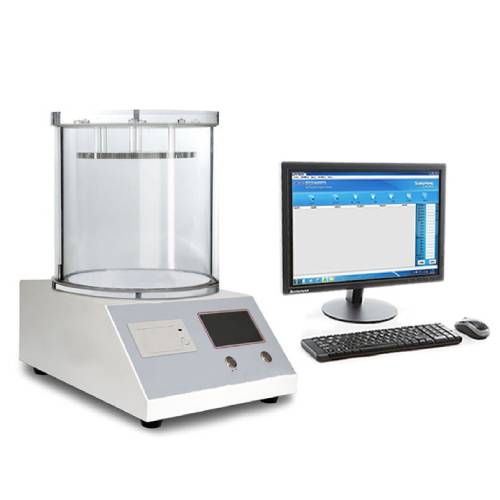
Heat-Sealing Process Defects: The Primary Cause of Sterile Barrier Failure
Heat sealing is the core process for forming a sterile barrier in medical device packaging. The three key parameters of heat sealing—temperature, time, and pressure—are closely interconnected. Improper adjustment of any one parameter may result in sealing quality problems.
Specifically, insufficient or excessive heat-sealing parameters can both cause sealing failure:
Insufficient heat-sealing temperature, inadequate pressure, or insufficient sealing time may prevent the adhesive layer from melting completely, resulting in partial sealing failure or false sealing.
Excessively high heat-sealing temperature may cause thermal deformation of packaging materials and even lead to embrittlement and cracking of the sealing edges.
Insufficient sealing width may increase the risk of damage during product storage and transportation.
Over-sealing may make package opening more difficult and reduce user convenience.
Channels, bubbles, or localized poor sealing after blister tray sealing are often caused by the combined effects of packaging materials, heat-sealing equipment, and process parameters, forming a typical “three-factor challenge”.
The testing principle of the Bubble Leak Tester is as follows:
The packaging sample is pressurized underwater to a preset pressure, and continuous bubble streams are observed to determine whether leakage exists.
During testing, a small hole is first created in the center of the package using a puncture tool. An air source and pressure monitoring device are then connected, and the package is immersed approximately 2.5 cm below the water surface.
The package is gradually pressurized to the minimum test pressure. This pressure should be determined in advance using a reference sample: a known defect is created using a 125 μm needle tip, and the sample is slowly pressurized until a stable continuous bubble stream appears. The corresponding pressure is defined as the minimum test pressure.
By observing bubble streams from sealing channels, pinholes, cracks, tears, and other damaged areas, operators can quickly determine whether heat-sealing defects exist.
Packaging Material Damage: Comprehensive Inspection from Pinholes to Perforations
Physical defects in packaging materials themselves are another major cause of sterile barrier failure.
Medical device packaging materials must not contain defects that affect sealing integrity, such as:
Perforations
Damage
Tears
Wrinkles
Localized uneven thickness
Gross leaks are usually caused by defects in packaging materials, improper heat-sealing parameters, or physical damage during transportation.
The standard requires:
“Inspect the entire package for bubble streams indicating defects such as sealing channels, pinholes, ruptures, and tears. The inspection time shall be determined according to the package size.”
The Bubble Leak Tester identifies different types of damage through continuous and stable bubble streams, including:
Sealing Channels
Small unsealed pathways formed during the heat-sealing process.
Pinholes
Tiny through-holes penetrating the packaging material.
Ruptures
Cracks caused by stress concentration within the packaging material.
Tears
Damage caused by transportation, handling, or usage.
The standard also requires:
“Remove the package from the water and mark all observed damaged areas.”
This provides clear evidence for quality traceability and failure analysis.
Precise Pressure Control and Automated Testing Performance
The Bubble Leak Tester provides a testing pressure range of 0–100 kPa with a testing accuracy of ±1%, enabling precise control of test pressure and preventing incorrect judgments caused by improper pressure settings.
The standard clearly states that the sensitivity of this test method depends on the pressure difference and pressurization method. Therefore, determining an appropriate test pressure for different packaging materials and specifications is essential for achieving repeatable test results.
The equipment adopts a PLC industrial control system and 7-inch HMI touchscreen, allowing automatic test operation after setting the test pressure.
A precision pressure regulating valve is used to adjust air flow, while the automatic constant-pressure compensation function ensures consistent testing conditions throughout the process.
Special Challenges and Solutions for Testing Breathable Packaging Materials2
For breathable packaging materials such as Tyvek and medical-grade dialysis paper, the materials themselves contain microporous structures. During testing, a “breathing effect” may occur:
Gas escapes uniformly through the material structure, producing background bubbles that can interfere with the identification of real leakage.
To address this challenge, the YY/T standard specifies Method B — the testing procedure for breathable packaging materials.
This method requires applying a blocking agent (such as paraffin oil) to temporarily seal the micropores on the material surface and prevent interference from background bubbles.
After the package is immersed approximately 2.5 cm below the water surface, it must remain immersed for at least 5 seconds before air is introduced.
The Bubble Leak Tester is equipped with a timing function, helping operators accurately control the immersion time and ensure that the blocking agent performs effectively. This avoids misjudgment caused by insufficient penetration time.
Standardized Testing Procedure and Result Evaluation
According to YY/T standards, the standardized testing procedure for non-breathable packaging is as follows:
1. Sample Preparation
Create a small hole in the center of the package using a puncture tool. Insert the air source and pressure monitoring device, then seal the puncture area using adhesive tape and a rubber pad.
2. Immersion and Pressurization
Immerse the package approximately 2.5 cm underwater. Use a depth limiter to maintain the correct immersion depth. Slowly pressurize the package to the minimum test pressure and maintain constant pressure if required.
3. Observation and Judgment
Inspect all areas of the package for damage.
Continuous and stable bubble streams indicate the presence of gross leakage.
Isolated individual bubbles are not considered leakage.
4. Result Recording
Remove the package from the water and mark all observed damaged areas.
Record:
Test date
Packaging information
Test pressure
Number of leaks
Leakage locations
Frequently Asked Questions
Q1: What bubble characteristics appear during bubble leak testing when heat-sealing parameters are abnormal?
A:Abnormal heat-sealing parameters usually cause sealing channels or partially unsealed areas. During bubble leak testing, these defects appear as continuous and stable bubble streams along the sealing edge, with bubbles continuously escaping from specific locations in the heat-sealed area.
If the false sealing is caused by insufficient parameters, the bubbles are usually small but continuous. If excessive temperature causes thermal deformation, bubbles are generally concentrated around cracks in the deformed area.
By analyzing the location and pattern of bubble streams, operators can initially determine the defect type and provide guidance for process improvement.
Q2: How can pinholes in the packaging material be distinguished from heat-sealing defects?
A:The location of bubbles is the key factor in distinguishing the two.
Heat-sealing defects usually generate bubbles along sealing edges or heat-sealed areas.
Pinholes or perforations in the packaging material generate bubbles from the material surface outside the sealing area.
The standard requires inspection of all damaged areas, including sealing channels, pinholes, ruptures, and tears. By marking the bubble locations, the source of defects can be effectively identified.
Q3: During breathable packaging testing, how can the blocking agent treatment avoid affecting the judgment of real leakage?
A:The standard specifies that breathable packaging must be treated with a blocking agent and immersed underwater for at least 5 seconds before pressurization begins.
The blocking agent temporarily seals surface micropores to prevent background bubbles but does not block actual leakage channels because leakage openings (typically larger than 50 μm) are much larger than the material’s natural micropores.
Therefore, after proper blocking treatment, any continuous bubble stream indicates genuine leakage.
During operation, ensure that the blocking agent covers critical areas such as sealing zones and that sufficient immersion time is maintained.
Q4: Can the Bubble Leak Tester detect all types of packaging damage?
A:The bubble method is mainly designed for gross leak detection. For defects with pore sizes above 250 μm, the detection probability is approximately 81%.
For micro-leaks smaller than 250 μm, such as extremely small pinholes or molecular-level permeability, the sensitivity of the bubble method is limited.
Additional methods such as dye penetration testing, vacuum decay testing, or high-voltage discharge testing may be required for comprehensive evaluation.
However, in medical device packaging quality control, gross leaks represent one of the major risks causing sterile barrier failure. Therefore, the bubble method remains an irreplaceable rapid screening tool.
Q5: How should defect locations be accurately recorded after leakage is detected?
A:The standard requires:
“Remove the package from the water and mark all observed damaged areas.”
Operators should use a waterproof marker to identify the exact location where bubbles appear and record detailed information in the test report, such as:
“Middle section of the left sealing edge”
“Center-right area of the front surface”
The number and location of leaks should also be recorded to support root cause analysis by quality engineers and enable targeted improvements in heat-sealing processes or packaging material evaluation.
Conclusion
The Bubble Leak Tester provides an effective and standardized solution for identifying packaging integrity issues, from false sealing defects to material perforations. By combining precise pressure control, automated operation, and visual leak detection, it helps medical device manufacturers ensure reliable sterile barrier performance.If you are looking for an ideal solution that meets various packaging integrity testing requirements, please feel free to contact us. We are happy to discuss your specific needs and provide professional technical support.
Previous: What is a zipper reciprocating tester?
N e x t : the last page
